

Melt & Pour Soap Making for Beginners

A good quality soap is the most crucial necessity in an individual’s personal grooming and hygiene. Many people are choosing handmade soaps to reduce their chemical exposure and carbon footprints. Artisan soap making is a flourishing hobby and a very popular start up idea. Whether you are looking to create soap as a hobby or to start a business from home, this tutorial will be most handy and useful.
A soap is basically a blend of oils, fatty acids, and sodium salt. There are three ways to make soap.
Hot Process Method

Soap is made by mixing Sodium Hydroxide (NaOH) commonly known as lye water with oils and fatty acids. They are given external heat to make a gel form which then hardens to form a soap.
Cold Process Method

Soap is made by combining lye water with oils and fatty acids at room temperature and after pouring the mix in moulds, the soap is left to cure for three to five days.
Melt and Pour Method

Soap is made by using a soap base that has already undergone the soap making process of combining lye, oils, and fatty acids. In this method you simply cut the soap base into small pieces, melt it and mould it.
When it comes to making homemade soaps, melt and pour method provides an excellent starting point for beginners.
Why is Melt and Pour soap making the preferred process?
- Melt and Pour soap do not require any curing time, which means they are set within 40 to 60 minutes of making and are ready to use once set.
- Soaps made with melt and pour process give the same moisturizing properties as a Cold Process soap owing to the presence of glycerin, sugar, and sorbitol.
- These soaps harden fast and give a consistent quality just like Hot Process soap but are much simpler to make.
- The safest method in soap making, with little supervision this method ensures that even children can pursue an exciting and useful hobby.
- Readily available tools and ingredients in your kitchen are the starting points to make melt and pour soaps. With minimal investment you can churn out a batch of soap for personal use or selling.
- You can explore a wide range of designs and combinations in melt and pour soap. You can add color, exfoliants, a combination of fragrances or essential oils, mica powders, embeds, herbs and botanicals to your soap.
- With melt and pour soap it is possible to create very diverse designs, using molds with very minute detailing. These soaps bring out the most exquisite and delicate design effortlessly.
- It is possible to rebatch your soap, if a certain design does not work as it should, unlike Cold Process soaps where the batch gets wasted, melt and pour soaps can be re melted and rebatched for use.
To make a nourishing bar of melt and pour soap, you will need the following ingredients :
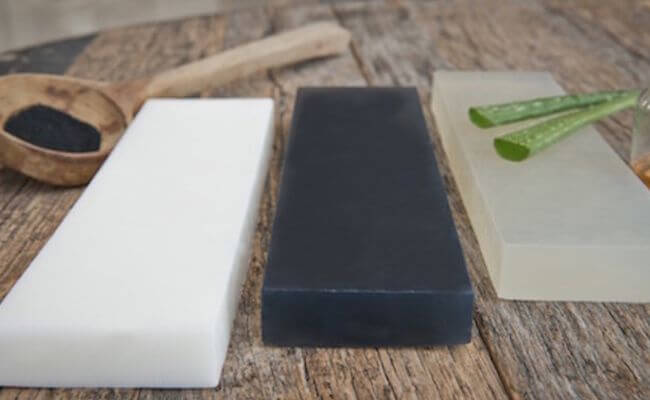
Soap Base
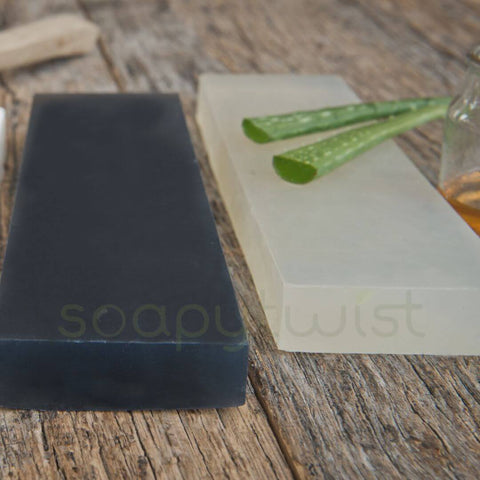
99% of your soap is your soap base, so you need to choose it wisely. While many options are available in the market, some may lure you with lesser prices, but always know that your skin needs the best quality ingredients.
Once you have procured a good quality soap base, the next thing you need is a fragrance to scent your soap.
In fragrances you have two options to choose from: Fragrance oils and Essential oils.
Fragrance oils

Fragrance Oils are synthetic, but safe to use on the skin. They only give fragrance or flavor to your soap. But the reason to choose them is that a wide variety of options are available in fragrance oils. This makes it very exciting to use in your soap making projects. You have many interesting options which make your soap project stand out.
Essential Oils

Essential Oils are natural, extracted from fruits, plants, and other botanicals. They give your soap fragrance along with exclusive properties and benefits.
Once you have selected your perfume for soap making, the next thing you need is a Soap mould.
3. A Soap mould must be of high quality, heat safe, that can sustain high temperature and is easy to use. While you may work with plastic moulds, and reuse yogurt containers as moulds, soap base boxes; it is best to work with silicone moulds. At first, the silicone moulds for baking can be used however, once used in soap making, do not return it to use in the kitchen.
Now that our mould is sorted out, we need to decide the method we will choose for melting our soap.
4. To melt the soap base, you may either use a microwave oven or a double boiler.
- To melt your soap in a microwave, you will need a heat-safe container or beaker. You can cut your soap base into small cubes, place it in a heat-safe container, and melt it in the microwave for 60-second intervals. Take it out of the oven, stir it well and if not melted fully, you can put it back in for another 30 seconds.
The melting point of the base in the microwave is 60 to 70 degrees Celsius which we can achieve by melting 100 grams base for 60 seconds at medium to high intensity.
- To melt your soap in a double boiler, you will need a readymade double boiler or make a double boiler by placing a wide saucepan half filled with water on a gas stove and immersing a second pan in that water filled with chunks of soap. Keep stirring it till it melts completely.
The melting point of the base in a double boiler is 50 to 60 degrees Celsius which we achieve by melting 100 grams base for 3 to 5 minutes at high flame through indirect heating.
5. Add color to soap: Adding color to your soap is optional, and if you choose to do so, make sure the color is cosmetic grade and skin-safe. There are many ways in which you can color your soaps. You can either use
- Skin Safe, soap-grade liquid pigments or
- Micas are naturally occurring minerals extracted from rocks and pearly powders that give a shimmering effect to your bar of soap
- You may also like to go with natural pigments like Herbal powders eg. Turmeric, neem, and strawberry, or Cosmetic Clays like Calamine Clay, French Green clay, and chocolate clay
The natural pigments give your soap color as well as their exclusive benefits however, herbal powders tend to fade in your soap over time.
Always note that it is not recommended to use food color in your soap as food colors are likely to fade away easily, also, in case of your designing projects where you use more than one color, food color will bleed and spoil the design of your soap.
Additionally, you will need the following soap making tools, equipment and ingredients.
- 99% Iso Propyl Alcohol commonly known as rubbing alcohol
- A Kitchen weighing Scale
- A sharp knife or soap cutter to cut the soap base
- Heat safe utensil for melting soap
- Spoon / Spatula or ice cream stick to mix melted soap
Now that we have all the necessary ingredients, tools, and equipment, let us see how we will make a simple melt & pour soap.
Five important tips before starting the melting process.
- You must cut your soap base into small cubes to ensure they melt evenly and completely.
- Always use as cylindrical heat safe container and not a wide mouthed bowl for melting your soap this will ensure concentrated heat to your soap base and it will melt efficiently.
- Always fill your container completely with soap base
- To compensate for the moisture loss while heating, you can add upto 1% filtered water to your soap base before heating it.
- For faster melting, its best you cover your container either with a lid or cling film.
Let us make Soap
- Sanitize work area & equipment
First thing to remember is, to always sanitize your work area and soap making equipment by spraying 99% Isopropyl Alcohol, commonly known as Rubbing Alcohol liberally and letting your equipment rest with the alcohol for some time before starting soap making.
2.Get the Soap Base Ready
Remove soap base from packaging and place on a cutting board. Cut the soap base into small, even-sized cubes (roughly 1” or 2.5 cm cubes). Place a large container on the scale and tare the weight. Add the soap cubes to the pitcher until you have 16 oz (454 grams) in the pitcher.
3. Melt the Soap base
Place container with soap base in the microwave and heat for 1 minute. Stir gently to help break up any clumps and help the soap melt more easily. If necessary, heat in 20-second intervals until most of the soap is completely liquid. It is fine if a few small pieces remain—just keep stirring until they are completely melted. Melted soap will be extremely hot, so use caution when handling it.
4. Add soap dye / natural colorant
Once the soap is completely liquid and all the pieces have melted, add soap dye and stir well to make sure it is completely incorporated. Start with 3-4 drops and add more until the desired color is achieved. You may notice a thin skin form on the surface of the soap. This is normal, so just stir it back into the liquid soap. If the soap has started to thicken at this point, it is fine to microwave again in 5-10 second intervals until it is thinner. In case you choose to go with herbs like turmeric or clays like red clay to color your soap, do not exceed 2% of your total output.
5. Add Fragrance Oil
Check the temperature of your soap at this point and make sure it is between 140-150ºF (60-65.6°C). Add your premeasured fragrance / essential oil to the soap base and stir well. Always add perfume at 2% of total output of your soap.
6. Let the soap set for 40 to 60 minutes
Once you have added your fragrance, it’s time to pour the soap into the mold. Pour slowly to minimize bubbles. Fill to the rim of the mold. Quickly spray the surface with rubbing alcohol to break up any bubbles that may have formed on the surface. It is OK to spray several times to eliminate as many bubbles as possible, however over spraying will cause the soap to foam.
7. Package your Soap
Once fully hard, pop the soap out of the mold and hand wrap it in cling film. You may also shrink wrap, stick on a label, and store it for future use.
8. Cleaning & winding up after Soap making
Melt and pour soap cleanup is so easy—soak your used utensils in hot water. After some time, use a scrub pad or sponge cloth to loosen larger pieces. If you are left with a thick layer of soap in your container, try pulling the layer of soap from the container while the soap is still warm. You can roll this into a little ball for fun and use it right away.
Never pour melted left over soap into the sink because that will choke your sink.
Once you become familiar with the basics of melt and pour soapmaking, you can get creative and have some fun with it! Melt and pour soaps can be a great way for beginners to get started in the world of homemade cosmetics. With few ingredients and minimal supplies, you can easily create your own unique soaps and have fun experimenting with your recipe. In no time at all, you will be able to proudly show off homemade soaps that you have made yourself!
Here's wishing you the most creative and rewarding experience with Melt & Pour Soap making!
3 comments
Well documented for beginners
Mridula Tandon
This article beautifully captures the essence of melt and pour soap making, ensuring beginners feel a surge of confidence to experiment with colors, fragrances, and molds.
VINEVIDA
GOOD INFORMATION
RAMAKRISHNA.P
Leave a comment
This site is protected by reCAPTCHA and the Google Privacy Policy and Terms of Service apply.