

7 COMMON SOAP-MAKING MISTAKES AND HOW TO AVOID THEM
Unlock the secret to perfect Soap Making: Craft your way to flawless Soap Bars!

Melt-and-pour soap-making is the most recommended method for beginners, DIY Skincare enthusiasts, home-based small business owners as well as children. However, like every hobby or home-based business venture, Soap-making also comes with its exclusive set of challenges. Many people come across 7 common Soap-making mistakes that need to be avoided. Soapy Twist helps you to understand these common soap-making errors and shares simple easy-to-follow tips to ensure that you avoid them.
Come, let us learn to overcome the common oversights in the soap-making process and ensure that our soap-crafting experience is nothing short of perfection.
1. My Soap Does Not Lather
Mistake: You added more carrier oil to the heated soap base than the recommended 1%
Outcome: Your soap surely becomes more moisturizing, but it will not lather well.
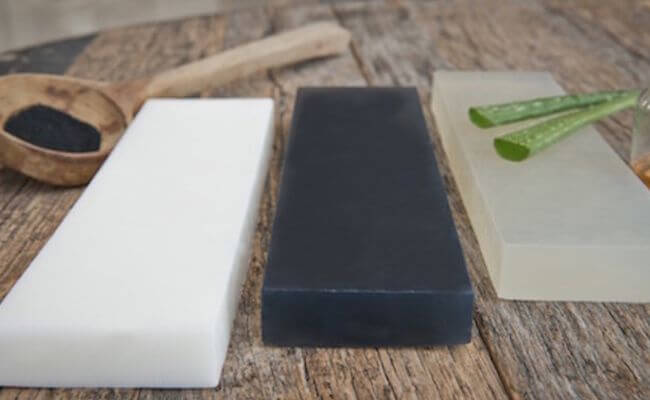
Tip: Choose a Soap base that has adequate moisturizing properties like Shea Butter and Goat Milk. If you still need to add carrier oil to your soap base, then opt for a Skin pH Bar Base in which you can add up to 2% of Carrier oil without affecting its foaming ability.
2. My Soap is Discolored, Cloudy, and is wrinkly
Mistake: You may have overheated your soap base.
Outcome: Your soap base is cloudy or discolored, has air bubbles, and gives out a soapy smell, it may get wrinkly as well.
Tip: Always melt your soap in small intervals (60 seconds) when using the microwave. Take out the soap from the microwave and stir it before popping it again for another 15 to 30 seconds. Always ensure that your soap base does not start boiling in the microwave oven while melting in an oven top the Soap Melter.
3. My Soap Layers fall apart and my soap has air bubbles
Mistake: You may not have sprayed Iso Propyl Alcohol on the surface of your soap before pouring the next layer and at the end to burst the air bubbles.
Outcome: Your layers fall apart and there is bubble formation at the surface.
Tip: Always spray rubbing alcohol before pouring the next layer of soap. Also, remember to burst the air bubbles by spraying rubbing alcohol after pouring soap in the mold.
4. My Soap Base curdles up and my soap gets cracked.
Mistake: You may have added too much fragrance or colorant.
Outcome: Your soap may get crackled, may fall apart, or may curdle up.
Tip: Always follow the recommendations made by the raw material supplier and follow the recipe to exact measurements. The general rule is to never exceed fragrance to more than 1%. Besides, add color drop by drop and mix well till you get your desired color. It's advisable to invest in a good quality Dropper or a Measuring jar for the purpose.
5. My Soap Sticks to the mold and comes out a little disfigured
Mistake: You are using incompatible molds
Outcome: Your soap does not demold as effortlessly as it should since the mold does not release the soap properly. Also, the mold may not be sturdy enough to hold the shape and the weight of the soap base.
Tip: Only use good quality heat-safe Soap Molds, always know that using the best quality ingredients will result in the best quality output.
6. My Soap Color fades away
Mistake: You have used food color or natural colorants like turmeric, neem, or beetroot powder.
Outcome: Food colors have been designed to serve the purpose of coloring food and have a different preservation system than cosmetic colors. Therefore, food color will fade away or bleed in your soap. On the other hand, natural colorants are plant-based and will have a short lifespan therefore, they too fade away.
Tip: Either opt for a combination of natural herbal powder to add color with Mica Powder or add clays to your soap to be as close to organic and natural as possible. Do not exceed the recommended dose of 1 to 4% in Herbal powders and Cosmetic Clays.
7. My Soap Sweats even after I have wrapped in Cling Film
Mistake: Wrapping soap in cling film or delay in shrink wrapping your soap may draw moisture from the environment and cause your soap to sweat.
Outcome: You will find small pearls on your soap that are owing to soap sweat.
Tip: Always Shrink wrap your soap once it's fully hardened and has completely cooled down.
CONCLUSION
The world of handmade soaps is as enchanting and rewarding as it can be sometimes challenging. To tread wisely and patiently while navigating the seven common mistakes that soap crafters often face ensures your learning is complete and your venture, successful. Armed with the knowledge of all the mistakes that soap makers encounter, along with tips to avoid them, you can joyfully embrace the learning process and revel in your creative excellence.
1 comment
Thanks for the valuble tips🙏
Shiny Jayan
Leave a comment
This site is protected by reCAPTCHA and the Google Privacy Policy and Terms of Service apply.