

Fun and Easy: Melt and Pour Soap Making for Children

Are looking for a creative and scientific exposure to give to your children?
Do you wish to help your children develop a useful vocational skill?
Would you like to constructively engage your children in a fun & easy hobby?
Will you like your children to adopt ecofriendly, zero waste lifestyle?
Does a personal hygiene routine for your children that is free from harmful chemicals comfort you?
If yes, then Melt and Pour Soap making is for your children!
Here we have shared a step-by-step guide that will help you initiate your children into this fun and easy melt and pour soap making project. Your children will get to apply many scientific concepts while creating exclusive designer handmade soaps. You can encourage children to make their own bath time fun with their exclusive creations or showcase their new skill by using them as return favors, personalized gifts and add them to DIY Skin care hampers.
-
Safety First
Before you start, ensure safety precautions are in place. Although melt and pour soap making is generally safe, the soap base can get hot. Adult supervision is necessary, especially during the melting process. Make sure the kids are using heat-safe containers and are cautious about the warm soap.
Materials You'll need to make homemade soap
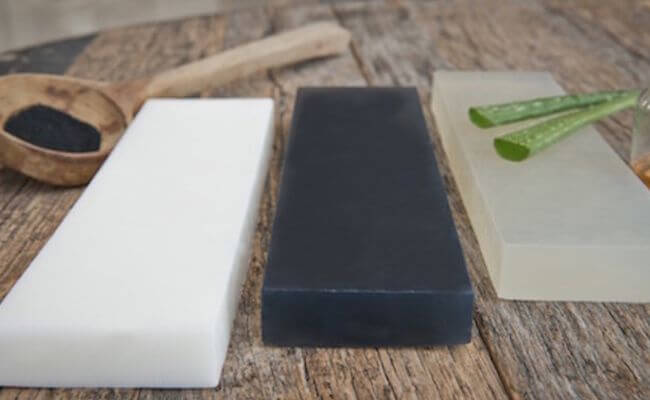
- A good quality Melt and Pour Soap base
- Heat Safe Container
Or
- A Double Boiler (can also be made at home by inserting a smaller pan in a pan full of water and placing the larger pan on the flame)
- Kitchen Weighing Scale
- Soap molds
- Cosmetic Grade Soap colorant
- Fragrance Oils
or
- Essential oils
- Herbal Powders to add to your soaps
- Iso Propyl Alcohol
- Ice Cream Sticks for stirring the base
The Process
- Firstly, cut the soap base into small chunks to help it melt faster and evenly.
- Place it in a heat-safe container and melt it in the microwave in short intervals of 60 seconds, stirring after each interval until the soap is completely melted.
- Monitor the kids during this process to ensure safety.
- Alternatively, add soap base in a double boiler and stir till it melts fully.
5. Add in the cosmetic grade color drop by drop and stir till you get your desired shade.
6. Furthermore, add your choice of scent, you can choose a Fragrance Oil if you want a wider variety; or an Essential Oil if you want to keep your soap fragrance natural.
- Do not add more than 2% of Essential oil or Fragrance Oil.
- Allow the kids to mix and match colors and scents to create their signature soap!
- If you wish to add herbal powder or clay to make a herbal soap, then add up to 2 % of herbs or clays.
- Next, carefully pour the mixture into the soap molds. Adult assistance might be necessary at this stage, as the soap mixture could still be warm.
- Spray some Isopropyl alcohol to get rid of any air bubbles that may form on the surface of your soap.
- Allow the soaps to cool and harden at room temperature for one to two hours.
- You need not place your soap in the refrigerator to speed up the process.
- Once the soaps are fully hardened, pop them out of the molds and they are ready to use!
- Wrap your handmade soap in cling film to protect it from environmental moisture and to store it for future.
Clean Up
The most crucial part is to involve your children in clean up after soap making.
- In a tub of hot water, immerse the used utensils till they are fully soaked.
- Let them soak in hot water for some time.
- Do not throw any melted left-over soap base directly into the sink as the base will harden and choke your sink.
- In case any left over melted soap is left, pour in a mold, and let it harden up.
- For hardened soap base stuck to your utensil, scrape it off with a knife (use adult supervision) and make a ball out of the soap shavings and use it.
- While the utensils are soaking, dip a mop cloth with warm water and wipe out the weighing scale as well as the soap making area to get rid of any soap / oil residue.
- With the help of a scrub or sponge, clean the soaked utensils till all the soap residue is washed away and leave all your utensils to dry in sun.
- Put away your Soap Making Kit neatly on a shelf for future use.
The Science Behind the Fun
While kids enjoy the creative part of making their soaps, they're also learning about science. The process of melting a solid (soap base) into a liquid and then it is turning back into a solid is a practical demonstration of the states of matter.
Additionally, when adding the color, they learn about mixing and creating new colors. For children in middle school, this is a practical application of their lesson on Acids, Alkalis and Salts.
Melt and pour soap making is more than just a fun activity. The thrill of using a bar of soap that they made themselves will surely make their bath time more enjoyable. Plus, it is a fantastic way to spend quality time together.
Ideas for Handmade Soap making with your children.
Among the most popular Soap Making Ideas for children are toy embed / eraser embed soaps where you insert a sanitized small toy or eraser into the melted soap after it has been poured into the mold.
Here, we are listing some exciting tutorials for you to see and learn from.
- DIY Popit Soap
- Kids Special DIY Chocolate Soap
- Hello Kitty & Doraemon Soap
- Picture Soaps Using Water Soluble Paper
Disclaimer: This DIY recipe is intended for educational purposes only and not to be used as professional or medical advice. While we strive to ensure the information is accurate, we make no representation of its accuracy, completeness or appropriateness for a particular purpose. Therefore, the user assumes full liability for all decisions made based on this information.
Leave a comment
This site is protected by hCaptcha and the hCaptcha Privacy Policy and Terms of Service apply.